Building a Video Wall for Reclaim Arcade
Just when I think @ReclaimArcade can’t get any cooler, an idea surfaces from a conversation that will take the space to another level. Now to just see if I can make it work :)
— timmmmyboy (@timmmmyboy) December 2, 2020
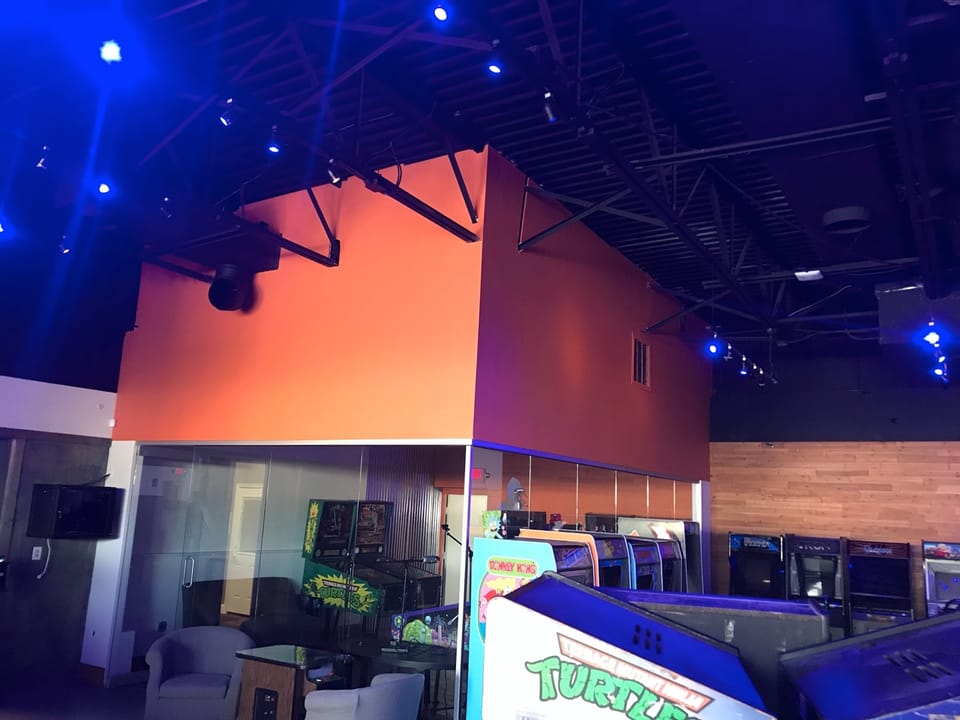
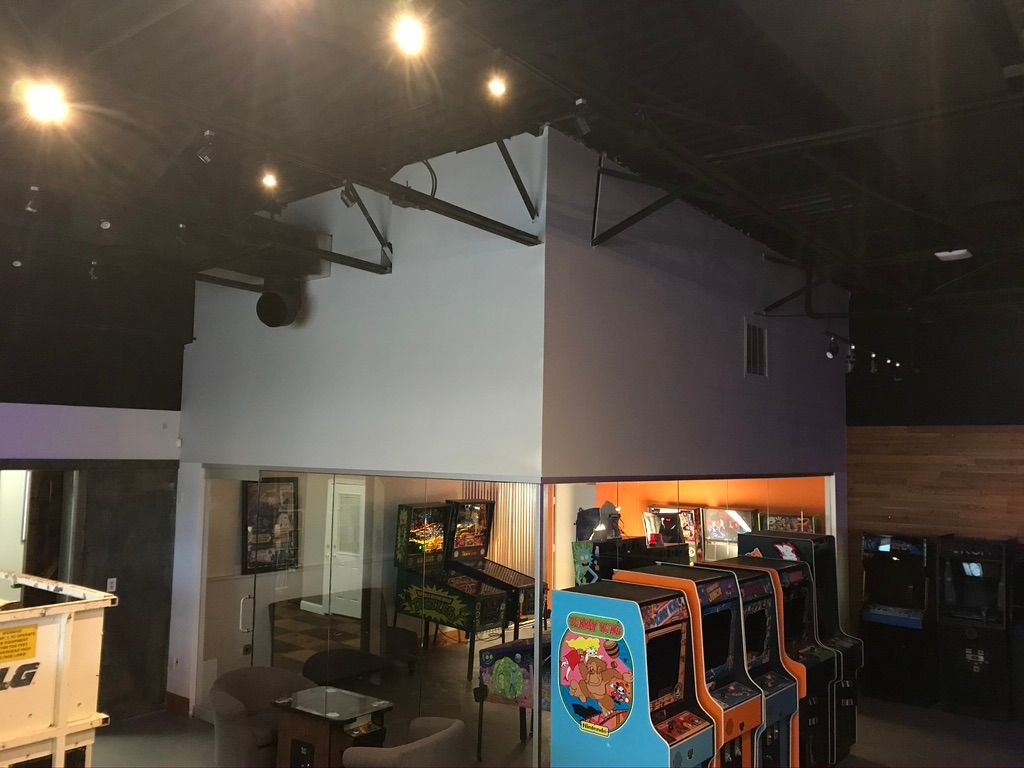
Part of the original plans for Reclaim Arcade had use removing the glass and ceiling from the area where the pinball machines were going to go (formerly a conference room when we ran the coworking space/office). With us adjusting plans for the arcade and minimizing the amount of construction we nixed that and decided to leave the glass room as it was for now. It does leave quite a canvas above it too, which previously was painted orange to go with the branding for CoWork.
The wall is screaming for some artwork and in typical fashion we wanted to grab someone we knew so we pinged Ryan Seslow to see what he could come up with. We've been talking over the past few months but this raging pandemic has really made travel between New York and Virginia difficult. On our last conversation while we were talking I looked up at the wall and said "What if we projected onto it instead?" And just like that we switched gears from painting to digital and my mind went racing on how to get the technical bits working to turn the entire wall into a digital surface.
The first step would be painting. I rented a scissor lift and got to work taping off everything (similar to how I did the green screen in the studio recently). I knew it would need a coat of primer so I spent a day getting that painted with the same paint sprayer I had on hand.
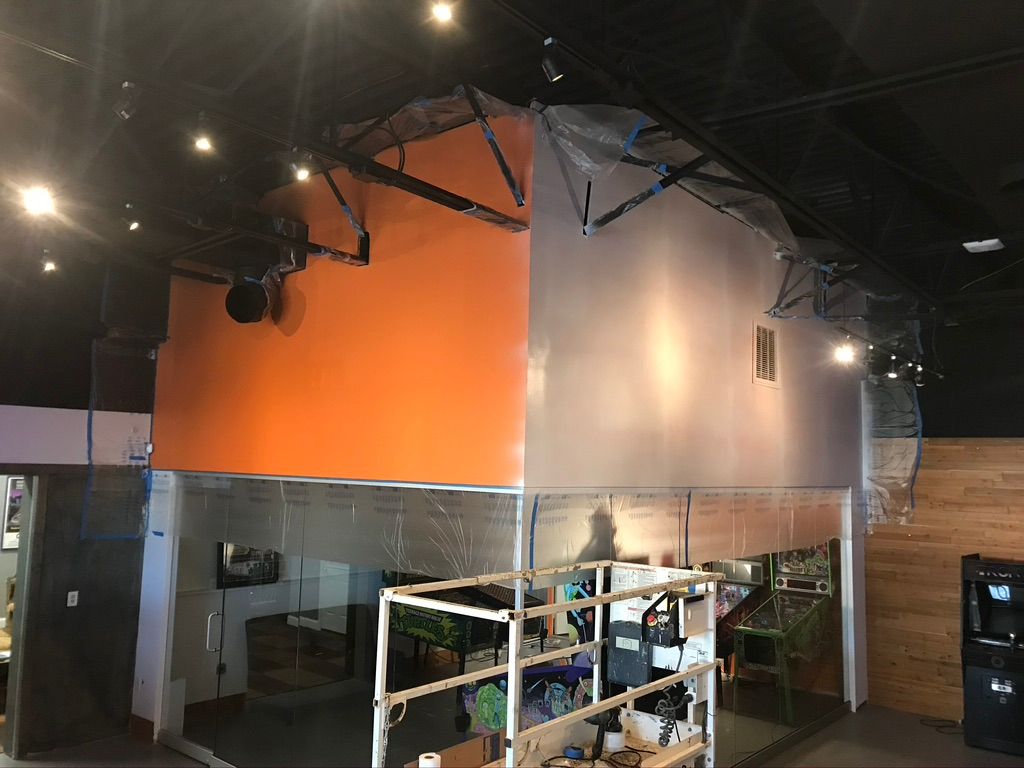
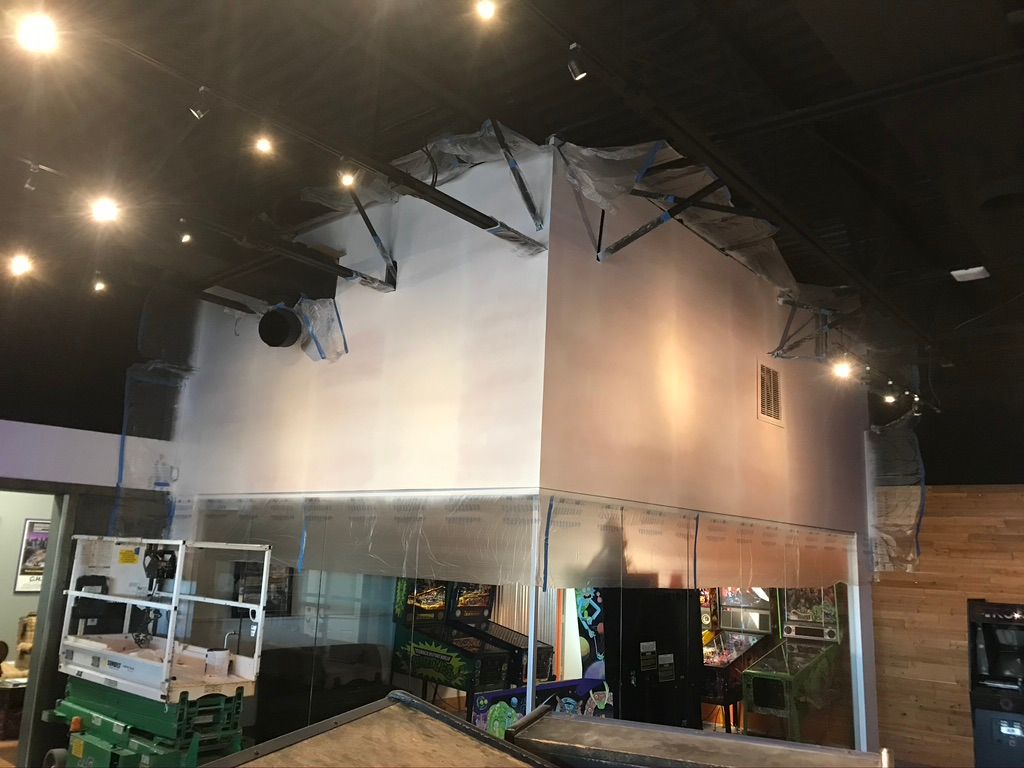
For a job this size it ended up being pretty brutal and so that same evening I went and bought a Graco Airless Paint Sprayer which I'm happy to report goes a hell of a lot faster. I can lay down all the paint for the entire wall in 30 minutes. You have to be more careful about covering up things since more of the paint tends to float into the air but it made quick work of this. For the actual paint job I bought paint that is specifically designed to be projected onto call Paint On Screen. It has silver in it to allow for rich contrast and is formulated to dry ultra smooth and it did not disappoint. If there's one thing I would have done differently it is to have read the manual on the airless sprayer and watch a few videos before starting with that fairly expensive gallon of paint. I'm here to admit that in my attempt to "prime" the sprayer I dumped ~1/2 gallon of that paint directly into a water bucket before I realized what was happening. What a nightmare. But the next day I came back resolved to figure it out and that I did. I had bought 2 gallons so I still ended up having enough to do 2 full coats of the projector paint which I finished in one day thanks to the speed of the sprayer.
So now with a true canvas to work from it was time to turn to the electrical and get some projections on it. I bought 3 Optoma GT1080HDR short throw projectors since I needed to cover a lot of space with a fairly short throw distance. Only downside to these projectors that I didn't realize at the time was that there is no optical zoom so I'd have to get the distance exactly right for the size of the wall when mounting. This calculator was also crucial in making sure prior to purchase that it would project at the size I needed with where I would be able to mount them.
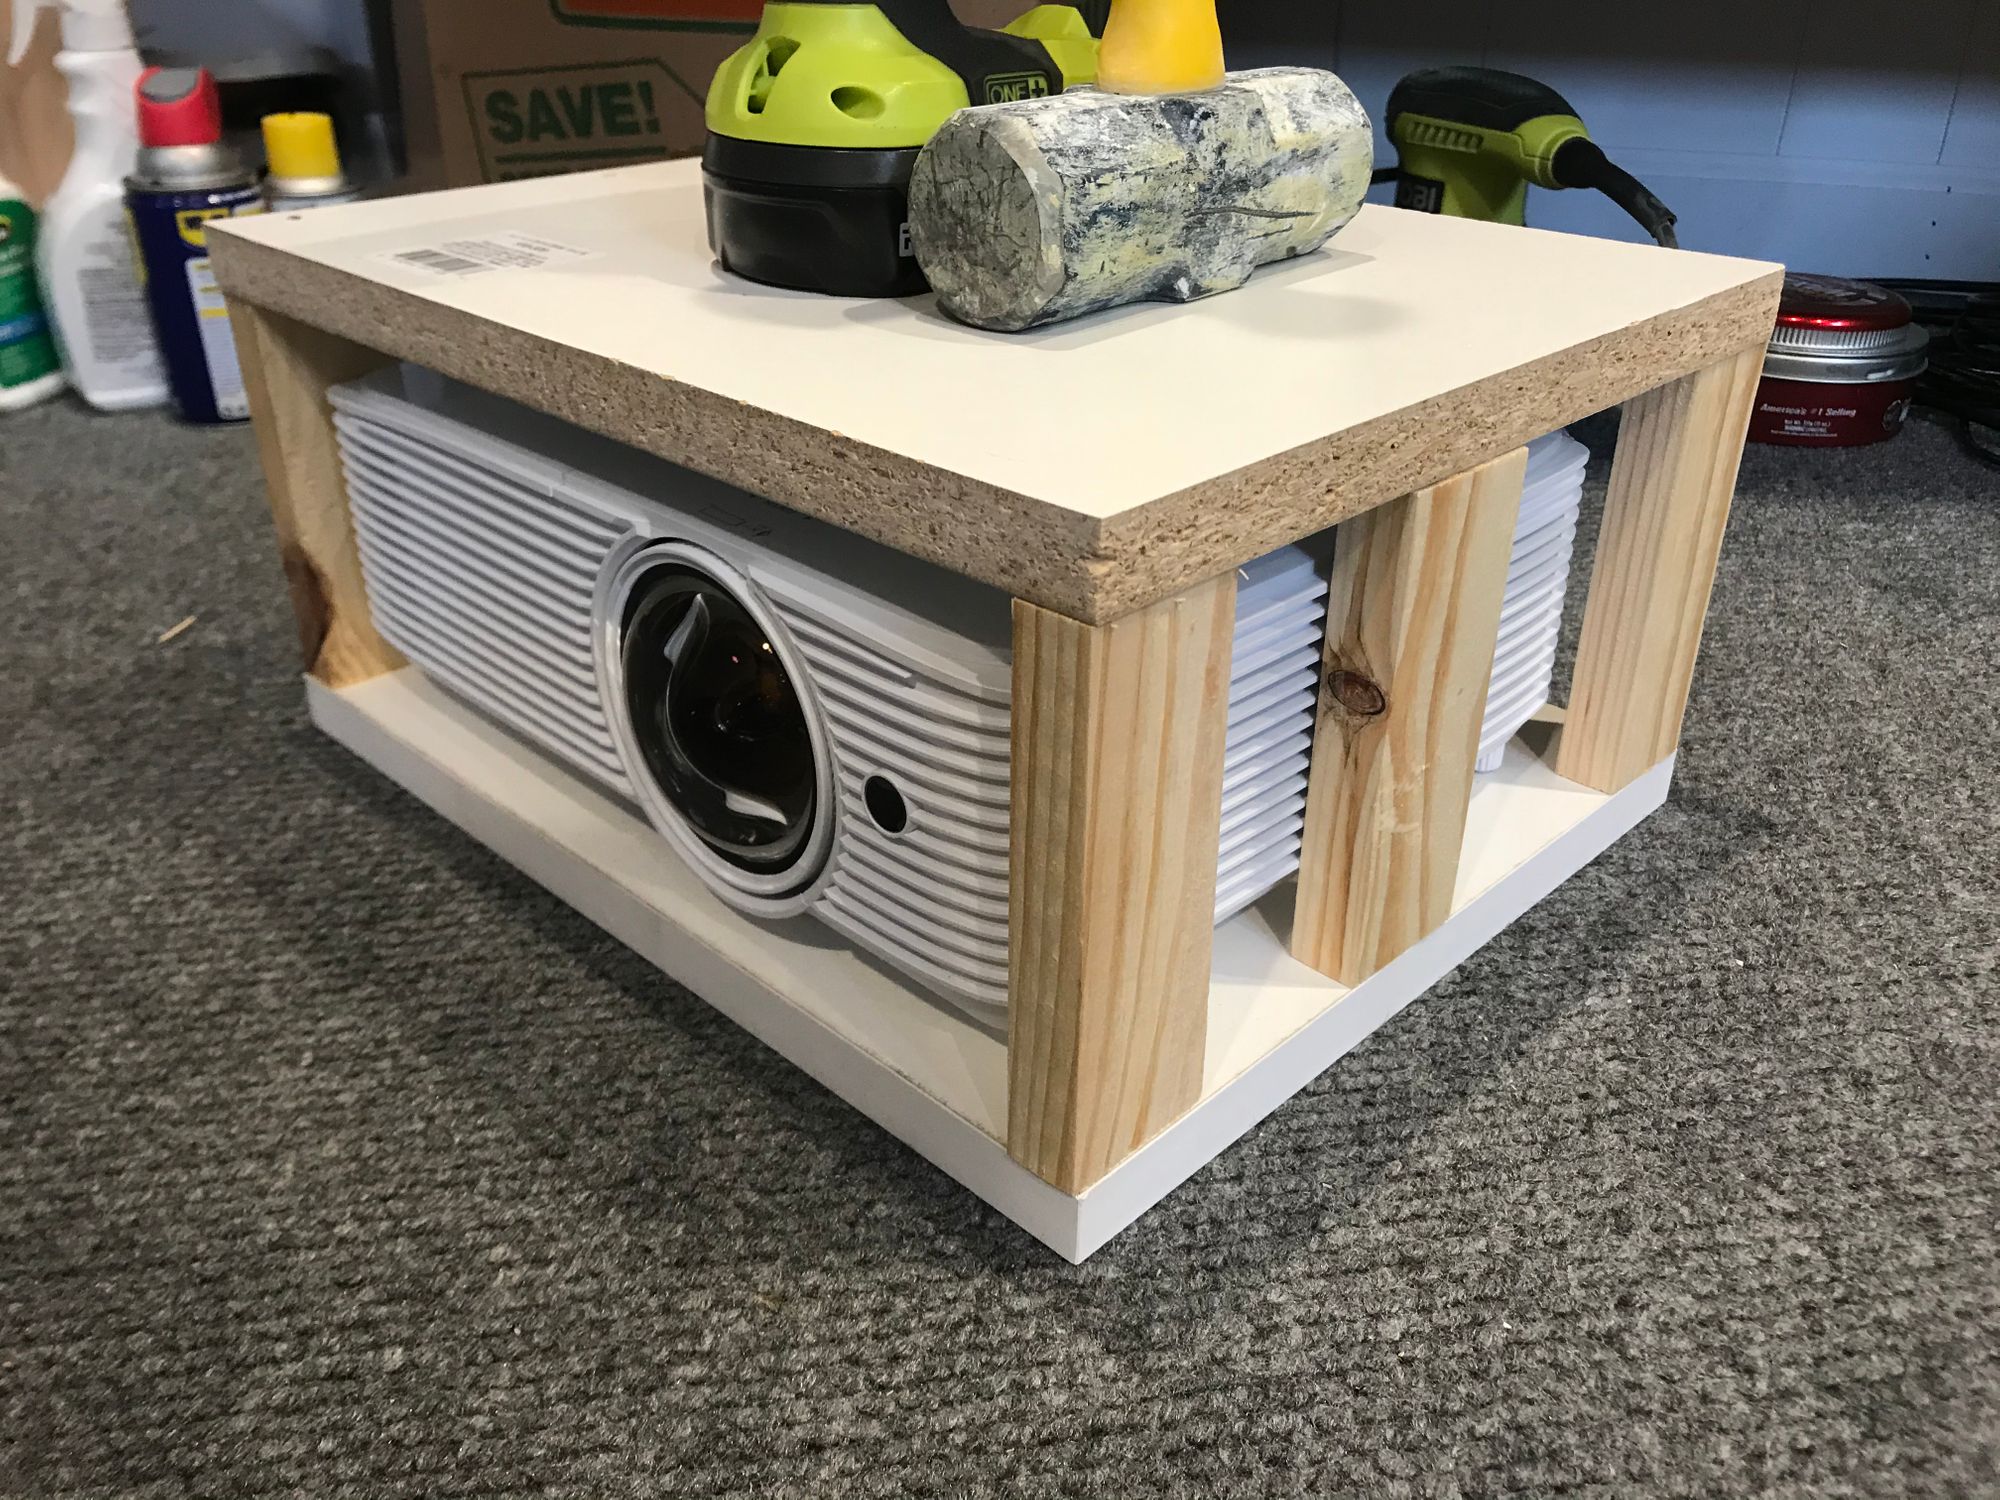
My brother-in-law happens to be an excellent electrician and all around handyman (plus he loves projects like this) so he came up to help me wire up the electric as well as built the right mounts for the projectors. I learned a lot during that process and can add terms like "Unistrut", "Purlin", and "All thread" to my vocabularly. I had a slight issue to overcome in that the generic ceiling mounts of I bought of course assume the projector will be upside down (pretty much all projectors have the mounting threads on the bottom and it's easy enough to flip an image in the settings. But with short throw projectors the angle an image comes out at is much steeper than a typical projector to allow it to be closer to the wall. When a projector is right side up that means it's projecting up but when upside down it's projecting down. To keep the projector upside down I'd have to have it mounted all the way at the top of the ceiling which wouldn't work since the exposed rafters and HVAC would all block the image. Instead I ended up making makeshift housings out of wood to hold the projectors right side up and still use the existing mounts I had. They came out pretty nice (ok they're not pretty, I'm not a woodworker, but they serve their purpose) and actually do a good job of concealing the white projectors too since I painted the housing black.
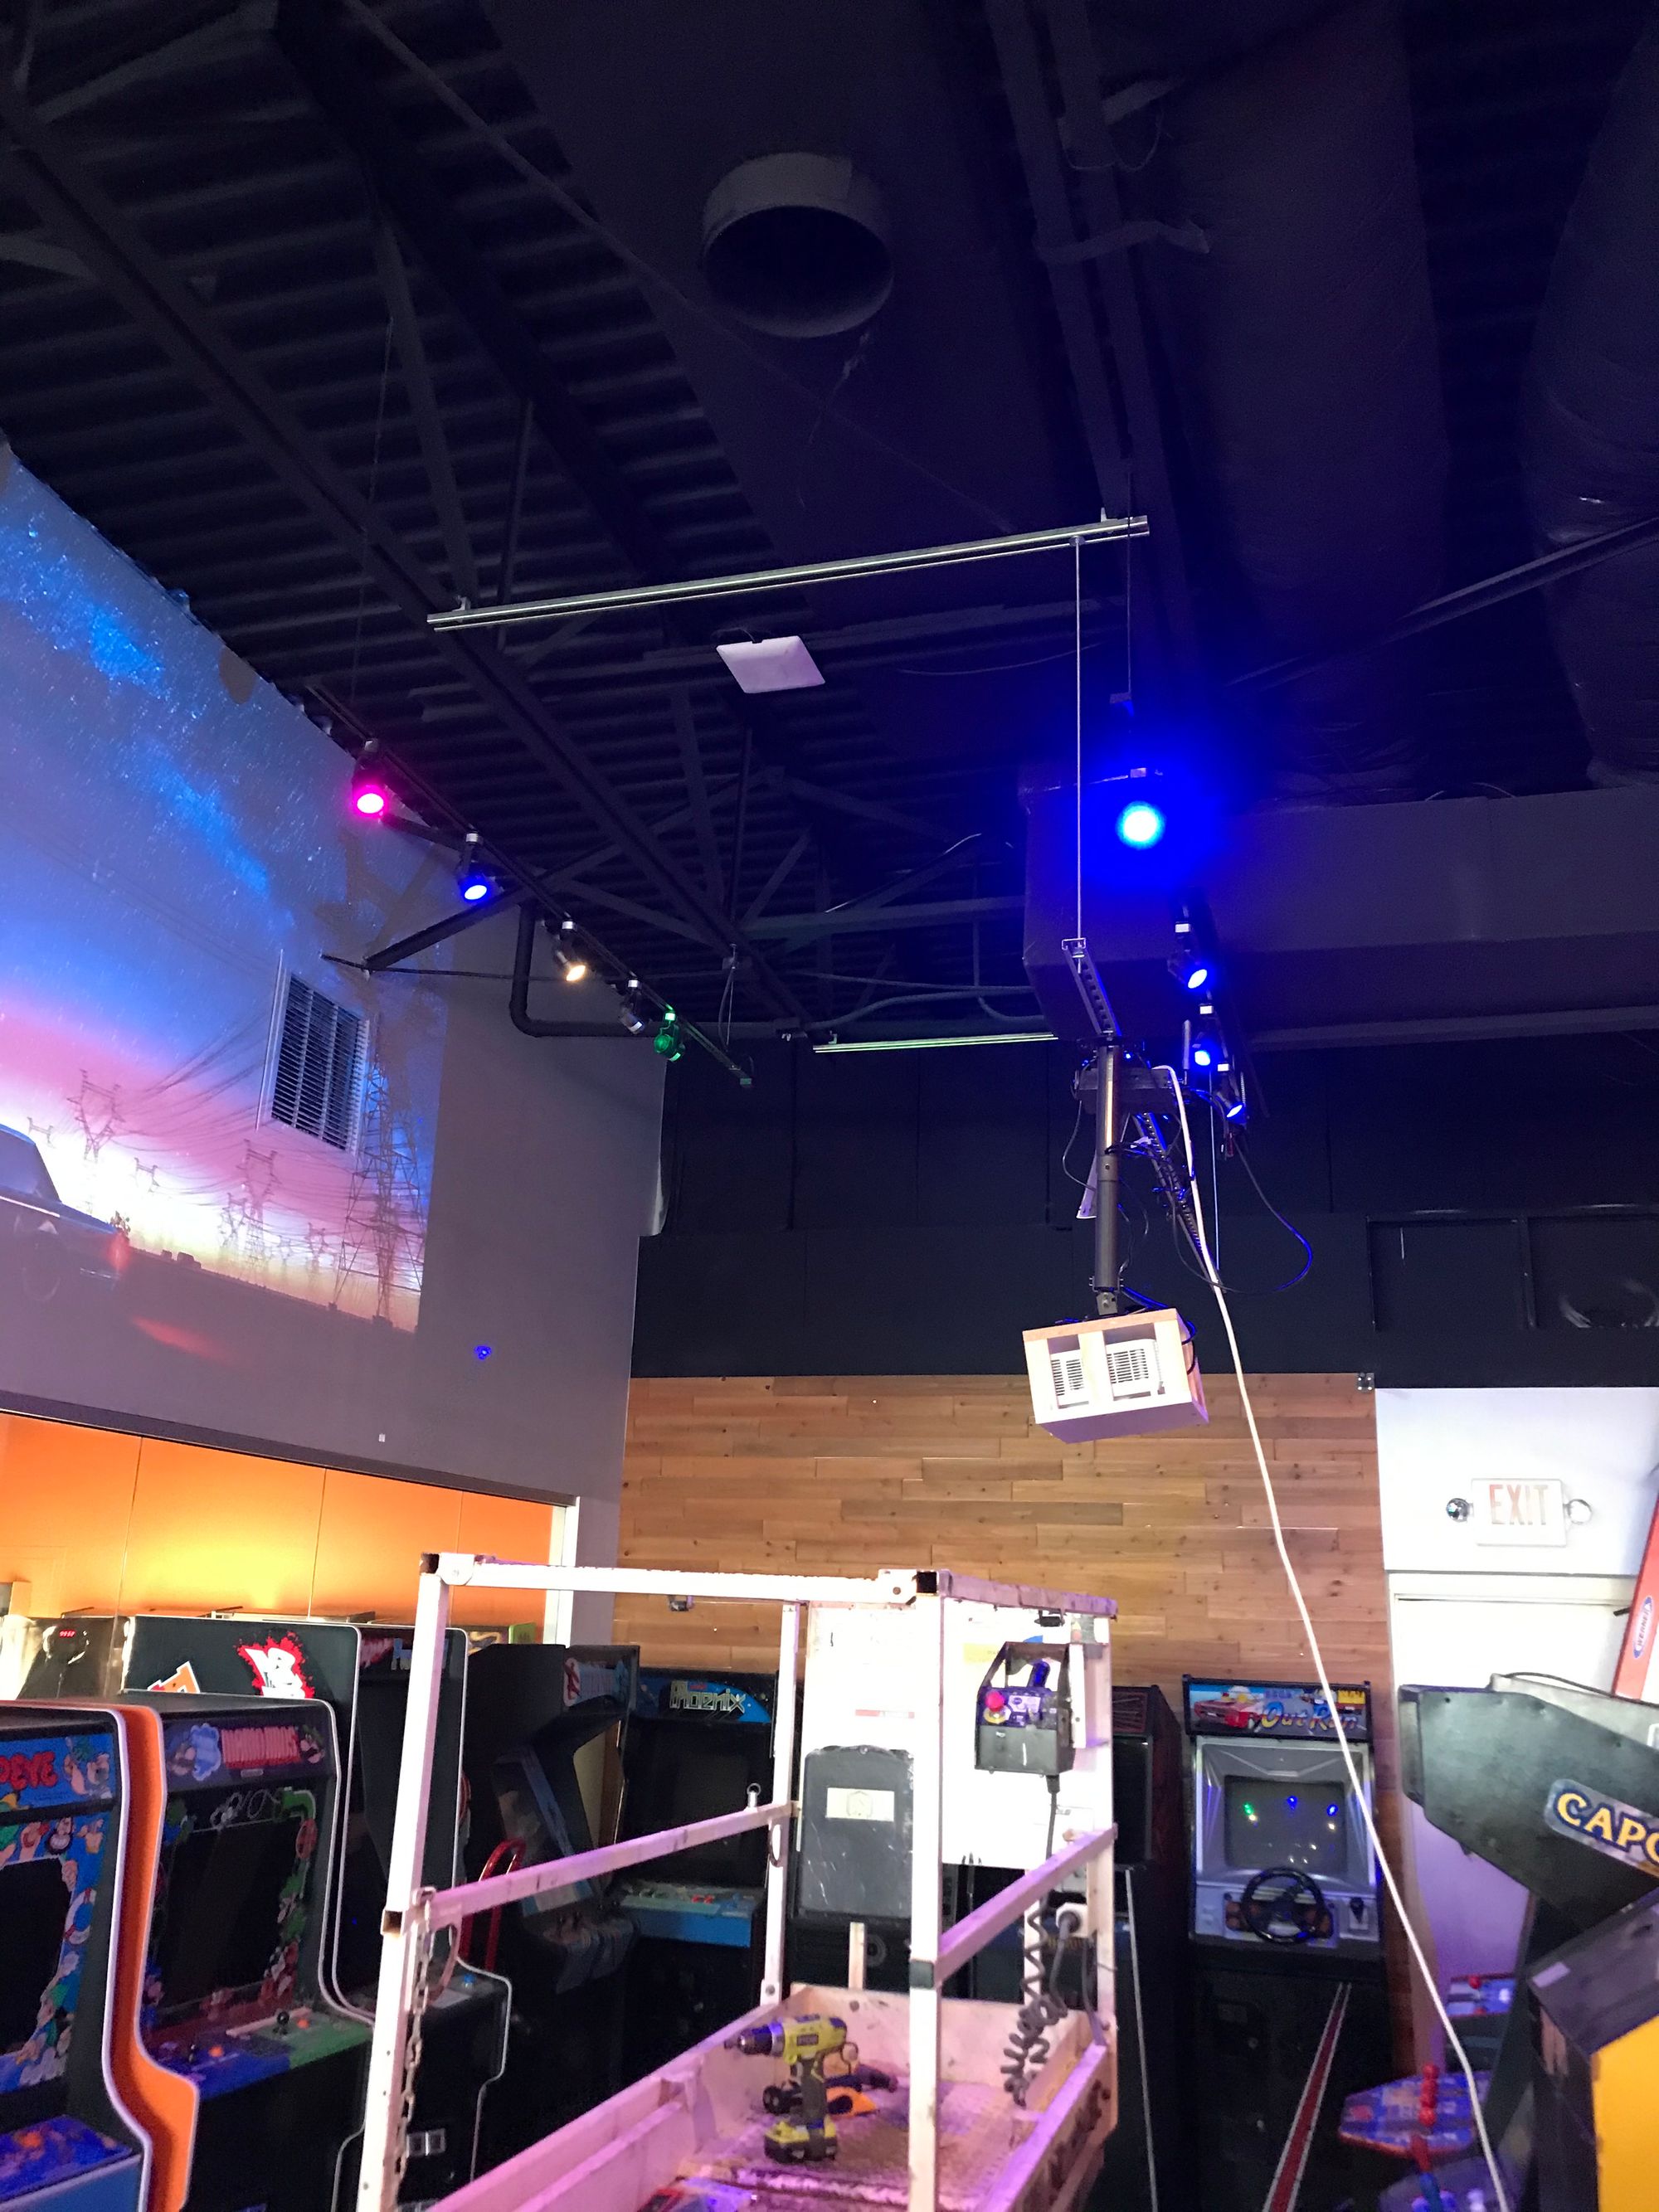
With 3 projectors I would need a computer that I could hook 3 displays to. At first I was looking into what it would require for me to run a computer from Reclaim Video to the projectors but converting HDMI to ethernet and back and running all that cable seemed daunting. I decided if the computer were small enough I could mount it in the ceiling right alongside the projectors and the runs would then be short enough for standard HDMI cables. I landed on this excellent Shuttle PC which has 3 outputs as well as a ton of USB ports and other things that I didn't need at the moment. It's small enough that it's meant to be hooked to a VESA mount behind a monitor but I just mounted it onto the same railing as the projector and then hooked up all three projectors to it.
Last but not least would be figuring out what software would drive all this. Again, I know nothing about projection mapping so this was all new territory for me. I guess I thought I could simply open a YouTube video and it would be full screen across all 3 monitors. Not the case! Pretty much every computer treats "fullscreen" as a per display option. Plus I would need to blend two of the projectors on the right side since there would be overlap and masking options would be useful for a few smaller details. I landed on MadMapper which is pretty impressive software, but sorely lacking good documentation so it was another steep curve to figure out how to use it. It's also a challenge for me because I connect to the computer remotely from my laptop to manage the displays but with three of them there's a lot of zoom in, zoom out and I can't be adjusting the software settings while running all three projectors with full screen video (I'd essentially need a 4th display for that). Despite all that complaining I managed to make it work fairly well I think and the result is honestly breathtaking.
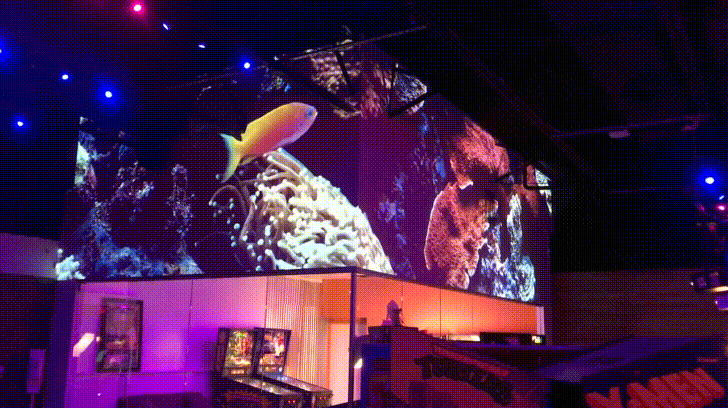
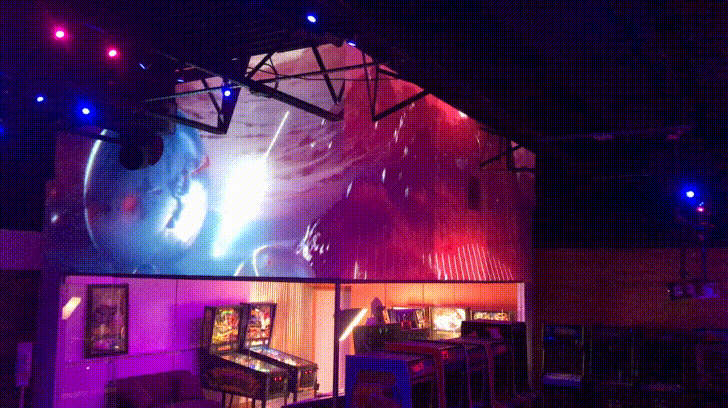
The real fun now starts as we think through what custom art for that wall could be, working with Ryan and other great artists to put their personal touch on such a large canvas which will be a blast. And I have to say while the arcade itself is something really special, this project in particular has been a real highlight for me and a piece of work I'm pretty damn proud of. Make art dammit!