Getting Started with Multisite - Part 3: Configuration and Comparison

Part 1: Why Multisite?
Part 2: Activation
Part 3: Configuration and Comparison
If you've been following along with this series of tutorials we've talked a bit about the how and the why of Multisite. At this point it probably makes sense to look at what it means to configuring some of the Multisite-specific aspects of WordPress and how it compares to a standard WordPress installation you might be used to.
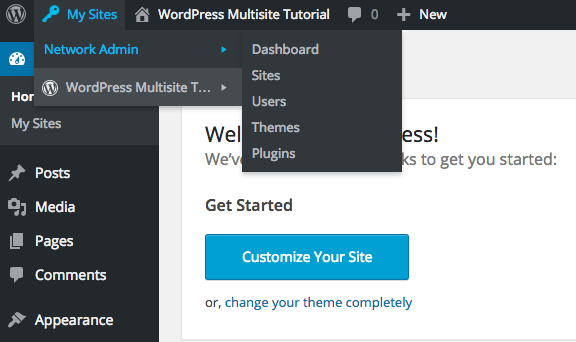
After getting Multisite setup your WordPress Dashboard probably doesn't look a whole lot different than it did previously, however when you login now you'll notice at the top that there's a new button, My Sites, which will now include a dropdown of any site on your network that you are a user in as well as quick access to shared features of the network like Plugins, Themes, and Users.
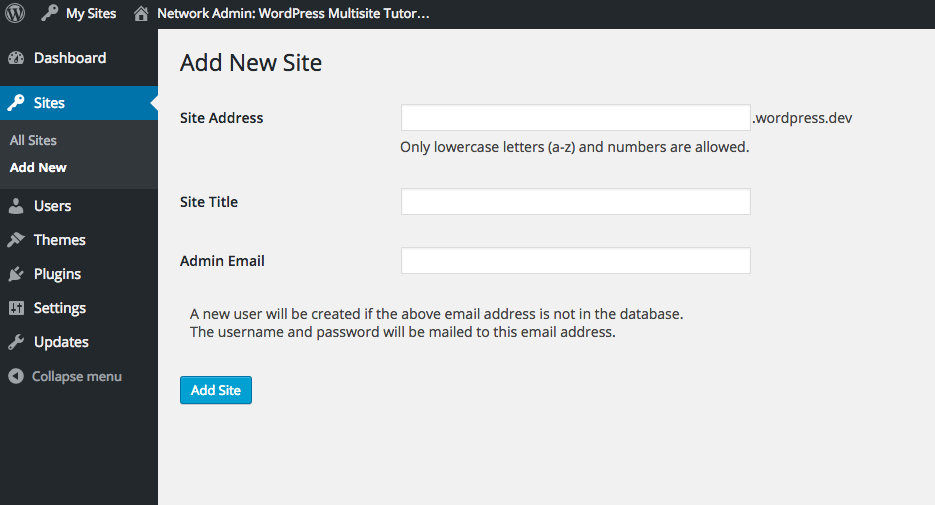
As a great first test you might try creating a new site by going to My Sites > Network Admin > Sites and clicking Add New. As you can tell from the screenshot here creating a new site couldn't be easier. Since we're setup for subdomains I can choose what I want the subdomain to be and give it a Site Title and Email Address for the administrator and we're good to go.
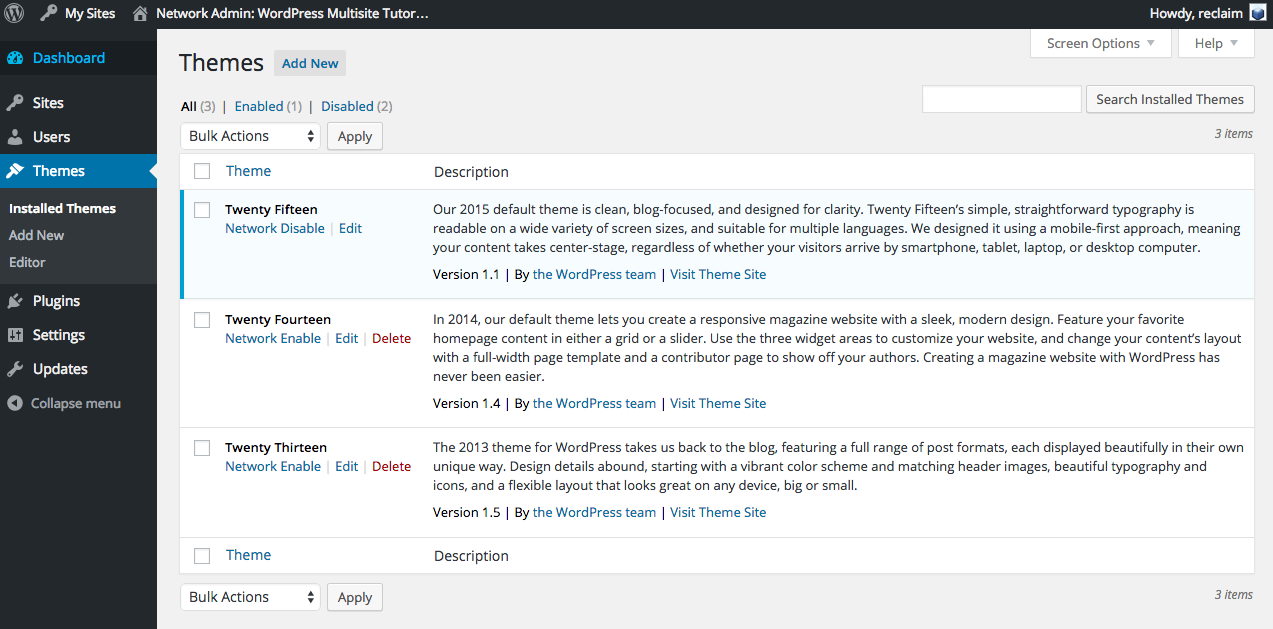
If you run WordPress on a hosting account you're probably used to installing themes and plugins through the dashboard of that site. In Multisite the only difference is that because plugins and themes are shared they need to be installed at the Network Admin dashboard. One interesting thing to note is that themes installed here need to be Network Activated in order to be available for activation on individual sites. This terminology is somewhat confusing when compared to plugins where Network Activated plugins are turned on and active for all sites by default. Plugins are available to all sites immediately after installing them however with themes if they are not "Network Active" then they will not show up in the theme list on an individual site's dashboard.
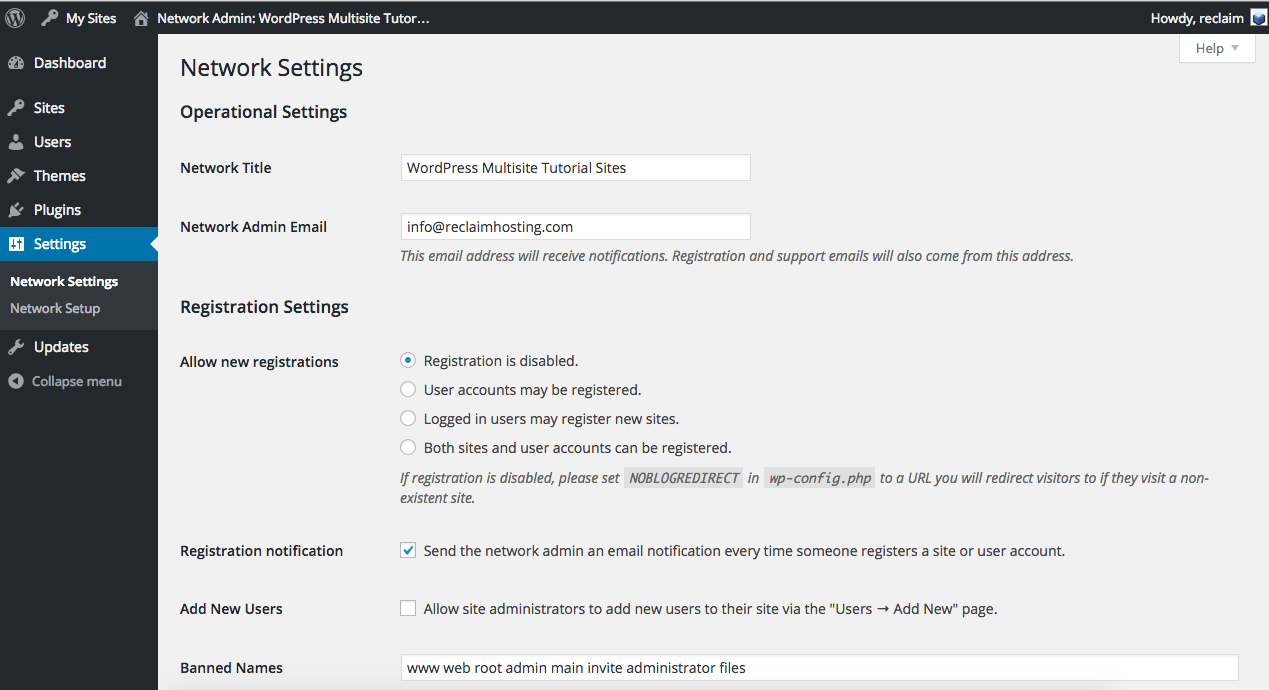
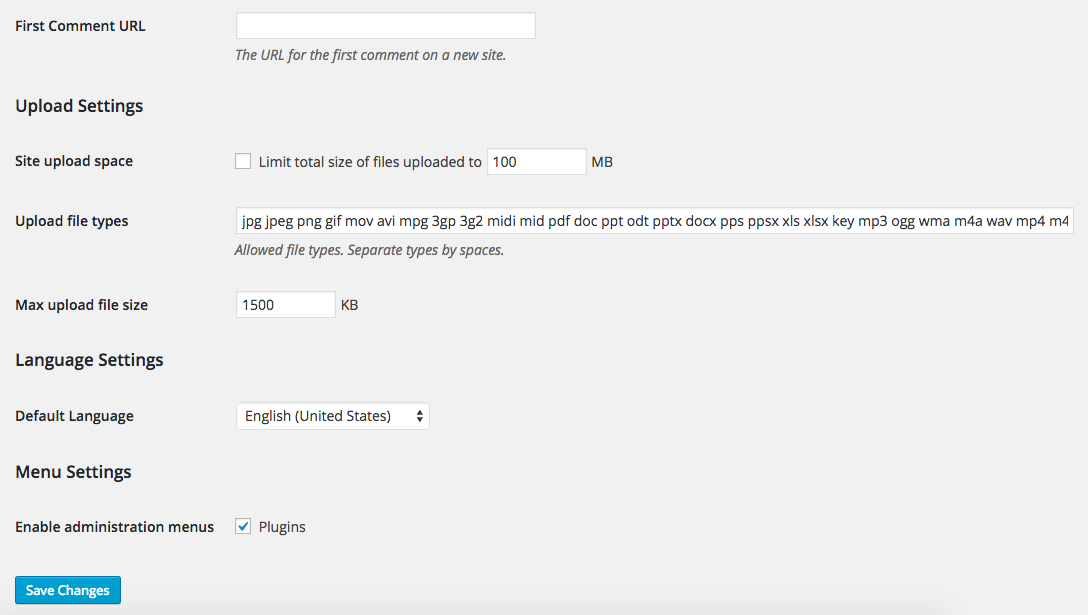
If you take a look at the Settings area of the Network Admin Dashboard you'll find a lot of options for configuring the network. By default registration is disabled which is a good thing because with it turned on you are very susceptible to spam site and account creation. I highly recommend adding user accounts manually or alternatively you'll find the option to whitelist certain email domains which is great for schools where you can add a domain like duke.edu and anyone with an email address utilizing that domain can register. With a normal WordPress installation you've likely seen the "Hello World" post and default content that shows up there. In the Network Settings you can actually configure what gets put into a new site in case you want to customize what a brand new site might look like from the default theme that is used to the post or comment that gets created. I'll be writing another guide on more advanced customization where you can tweak things like that even further using a handful of plugins.
The final settings that you'll want to make note of because they often trip folks up are the upload limits and file type/size limitations. If you're using this network just for your own size I highly recommend going ahead and raising the default limits to something much higher like 50,000Kb (50Mb). Enabling the plugin administration menu will expose the ability for other users on sites in your network to activate plugins (great if you're using Multisite for yourself or want to have that option for users). Plugin installation will still need to be done from the Network Admin area however.
Updates in the network to both WordPress as well as plugins and themes all happen within this Network dashboard as well rather than on individual sites. Remember with Multisite every site is sharing one set of code and the same themes and plugins and so only the network administrator (you) has access to run the updates and they are done at the top level Network Dashboard. This makes the process so much easier than the headache of updating individual sites, plugins, and themes for all of your various sites every time a new version is released.
Pro Tip: The default for new installs on Reclaim Hosting is for automatic updates to plugins, themes, and WordPress itself removing the requirement that you manually do it. WordPress also issues automatic updates for minor security releases as well.
A lot of the configuration and tweaking for Multisite will depend on whether you're the only person using it or whether you'll have other users playing in your sandbox as well as far as how much control and freedom you give individual users of sites and what you make available. The great thing is you have lots of options. In the final tutorial I'll be showing you some ways to make use of a handful of plugins that will take your Multisite installation from just a convenient consolidation of your existing work to a super-charged and powerful platform for building anything you can imagine for the web.